

The Hario V60 is perhaps the most popular pour over on the market today, and for good reason: it makes a delicious cup of coffee, it’s easy to use, and it’s really fun! And while your local barista can make the process look intimidating, if you follow these professional tips, you’ll be making café-quality craft coffee in no time.
Aside from a Hario v60 coffee dripper, you will also need the following items.
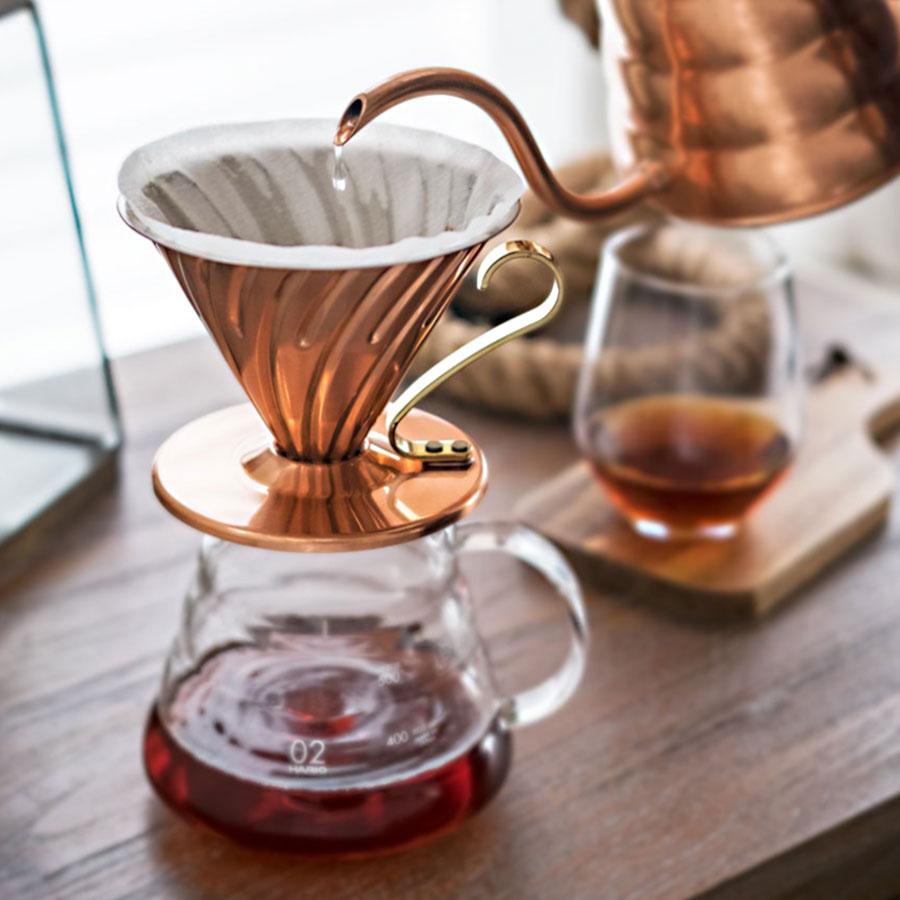
- Hario V60 paper coffee filters
- 25 grams of your favorite coffee
- 400 grams of water, plus a bit extra for pre-wetting your filter
- Decanter
- Timer
- Kettle, preferably a gooseneck kettle
- A Scale
- Burr Grinder
1. Heat Water
You want to heat your water to 200 degrees. Use a thermometer, or if that's not available, bring your water to a boil, then let it sit for about 30 seconds to bring it down to 200 degrees.
2. Measure And Grind 25 Grams Of Coffee (Medium-Fine)
Choose your favourite coffee beans. We recommend a lighter roast, and something with high acidity and flavour. Let's get those flavours poppin!!
A medium to fine grind will be slightly more coarse than table salt. In making a pour over coffee, we recommend grinding your coffee immediately before you begin brewing. If your coffee is ground too early, it will lose a lot of its flavor and aroma.
3. Fold V60 Filter
Fold the flat edge of the V60 paper filter; place filter in dripper; place dripper on decanter.
One benefit of the V60 is that you can brew directly into any mug, cup, or decanter, which makes clean-up a breeze.
4. Pre-Wet Filter
Pre-wetting the filter will wash away some of the papery residue, resulting in a cleaner brew. Additionally, it will seal the filter to the sides of the dripper, and it will preheat the vessel you’re brewing into. Don’t forget to discard this water before you begin brewing!
5. Add Coffee And Tare Scale
Add your coffee and give the V60 a soft shake to settle the grounds into a flat surface, also known as the coffee bed. This will allow for more even extraction by avoiding pooling.
Place it on top of your scale and tare it to zero. We are aiming for 300-400grams of water over a 2-3 minute brew time.
6. Bloom
Add just enough water to the grounds to evenly saturate them. Let this sit for 45 seconds. This is called the “bloom,” and it kickstarts a chemical reaction where gasses are purged from the ground coffee.
If you add all the water right away, these gasses will become trapped in the coffee and affect the taste.
7. Pour Remaining Water
Once your timer hits 45 seconds, continuously add water to the coffee bed. Do this by pouring slowly in spiraling circles around the outer circumference of the circle where your coffee is sitting.
Do not pour the water directly onto the filter, and don’t let the water level get too close to the top edge of the dripper.
Stop pouring once you’ve added 400 grams of water. This should take roughly a minute.
8. Allow Water To Drain
Once the water has finished draining through the filter, you’re ready to enjoy your coffee!
From start to finish, this should take between 2:15 and 2:30. If the overall time is significantly outside of this range, you will need to adjust the coarseness at which you ground your coffee.
When you’re finished, discard the used paper filter and grounds. That’s it! Time to kick back and enjoy your coffee.